Adding Google OAuth2.0 to a Dotnet WebAPI Project
For one of my most recent projects, I have been designing a logbook application to help skydivers digitally log their jumps. I decided to use ASP.NET Core WebAPI as the backend component and use React as the frontend.
This is my second attempt at such an application, and I believe it’s going a lot better this time around. On this version, I am requiring that I make the application minimal. I wanted to use a simple Google OAuth and use the requested information to generate the user’s unique IDs and respective tables. The UI makes requests to a server which then talks to a NoSQL database to handle logging or modifying user information. In this decision, I would not have to store sensitive user information like a password. I would also technically not need to know their name (although that would be nice). All I would need is an email.
The biggest hurdle I faced was figuring out how to authenticate with Google. It took me a long time to figure out, and I almost gave up to try another authentication method. Now that I have a better grasp on how it works, I wanted to share what I have learned in this post.
Access Token vs ID Token
The first thing I failed to understand is that there are two types of token when authenticating with Google. The first is an Access Token and the other is an ID Token. An ID Token is a JSON Web Token (JWT) that stores what are called “claims” about a user’s identity. This could be an email, name, or anything else needed about their identity.
An access token is a way to give an application permissions to access a server for a user. The server verifies the access token and then gives the requested information if valid. ID Tokens or auth tokens help determine that the user is who they say they are.
Here is an example of a JWT Token. You can use websites such as jwt.io to view the decoded version of the token. Alternatively, I interpret each section below.
1
eyJhbGciOiJIUzI1NiIsInR5cCI6IkpXVCJ9.eyJzdWIiOiIxMjM0NTY3ODkwIiwibmFtZSI6IkpvaG4gRG9lIiwiaWF0IjoxNTE2MjM5MDIyfQ.SflKxwRJSMeKKF2QT4fwpMeJf36POk6yJV_adQssw5c
The token has three primary sections which are divided by a .
The Header
Typically consists of two pieces of information: the type of the token (JWT) and the signing algorithm that is being used.
eyJhbGciOiJIUzI1NiIsInR5cCI6IkpXVCJ9
1
2
3
4
{
  "alg": "HS256",
  "typ": "JWT"
}
The Payload
The payload portion contains the claims. For example:
eyJzdWIiOiIxMjM0NTY3ODkwIiwibmFtZSI6IkpvaG4gRG9lIiwiaWF0IjoxNTE2MjM5MDIyfQ
1
2
3
4
5
{
  "sub": "1234567890",
  "name": "John Doe",
  "iat": 1516239022
}
The Signature
This is the part that is used to verify the sender is who they say they are. It is also used to verify there was no modified content while sending the token to its intended destination. This is performed by encoding the header, payload, and a secret key. The hashed result becomes the signature. The below assumes SHA256 encoding.
SflKxwRJSMeKKF2QT4fwpMeJf36POk6yJV_adQssw5c
1
2
3
4
5
6
7
HMACSHA256(
  base64UrlEncode(header) + "." +
  base64UrlEncode(payload),

your-256-bit-secret

)
Setting Up With Google
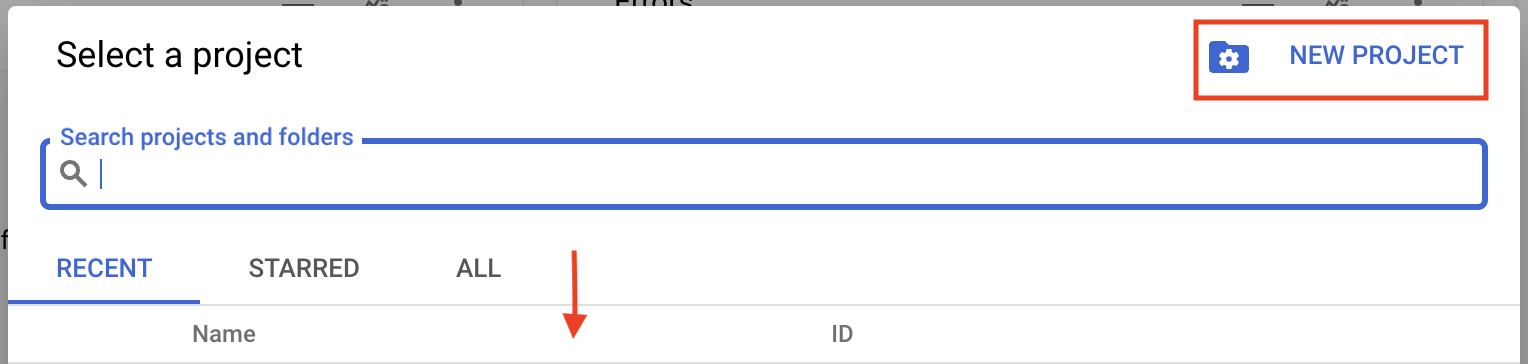
The first step is creating a project with Google Cloud. In the cloud console, select or create a project.

Next, select either your existing project or “New Project”. Provide a name for the project.
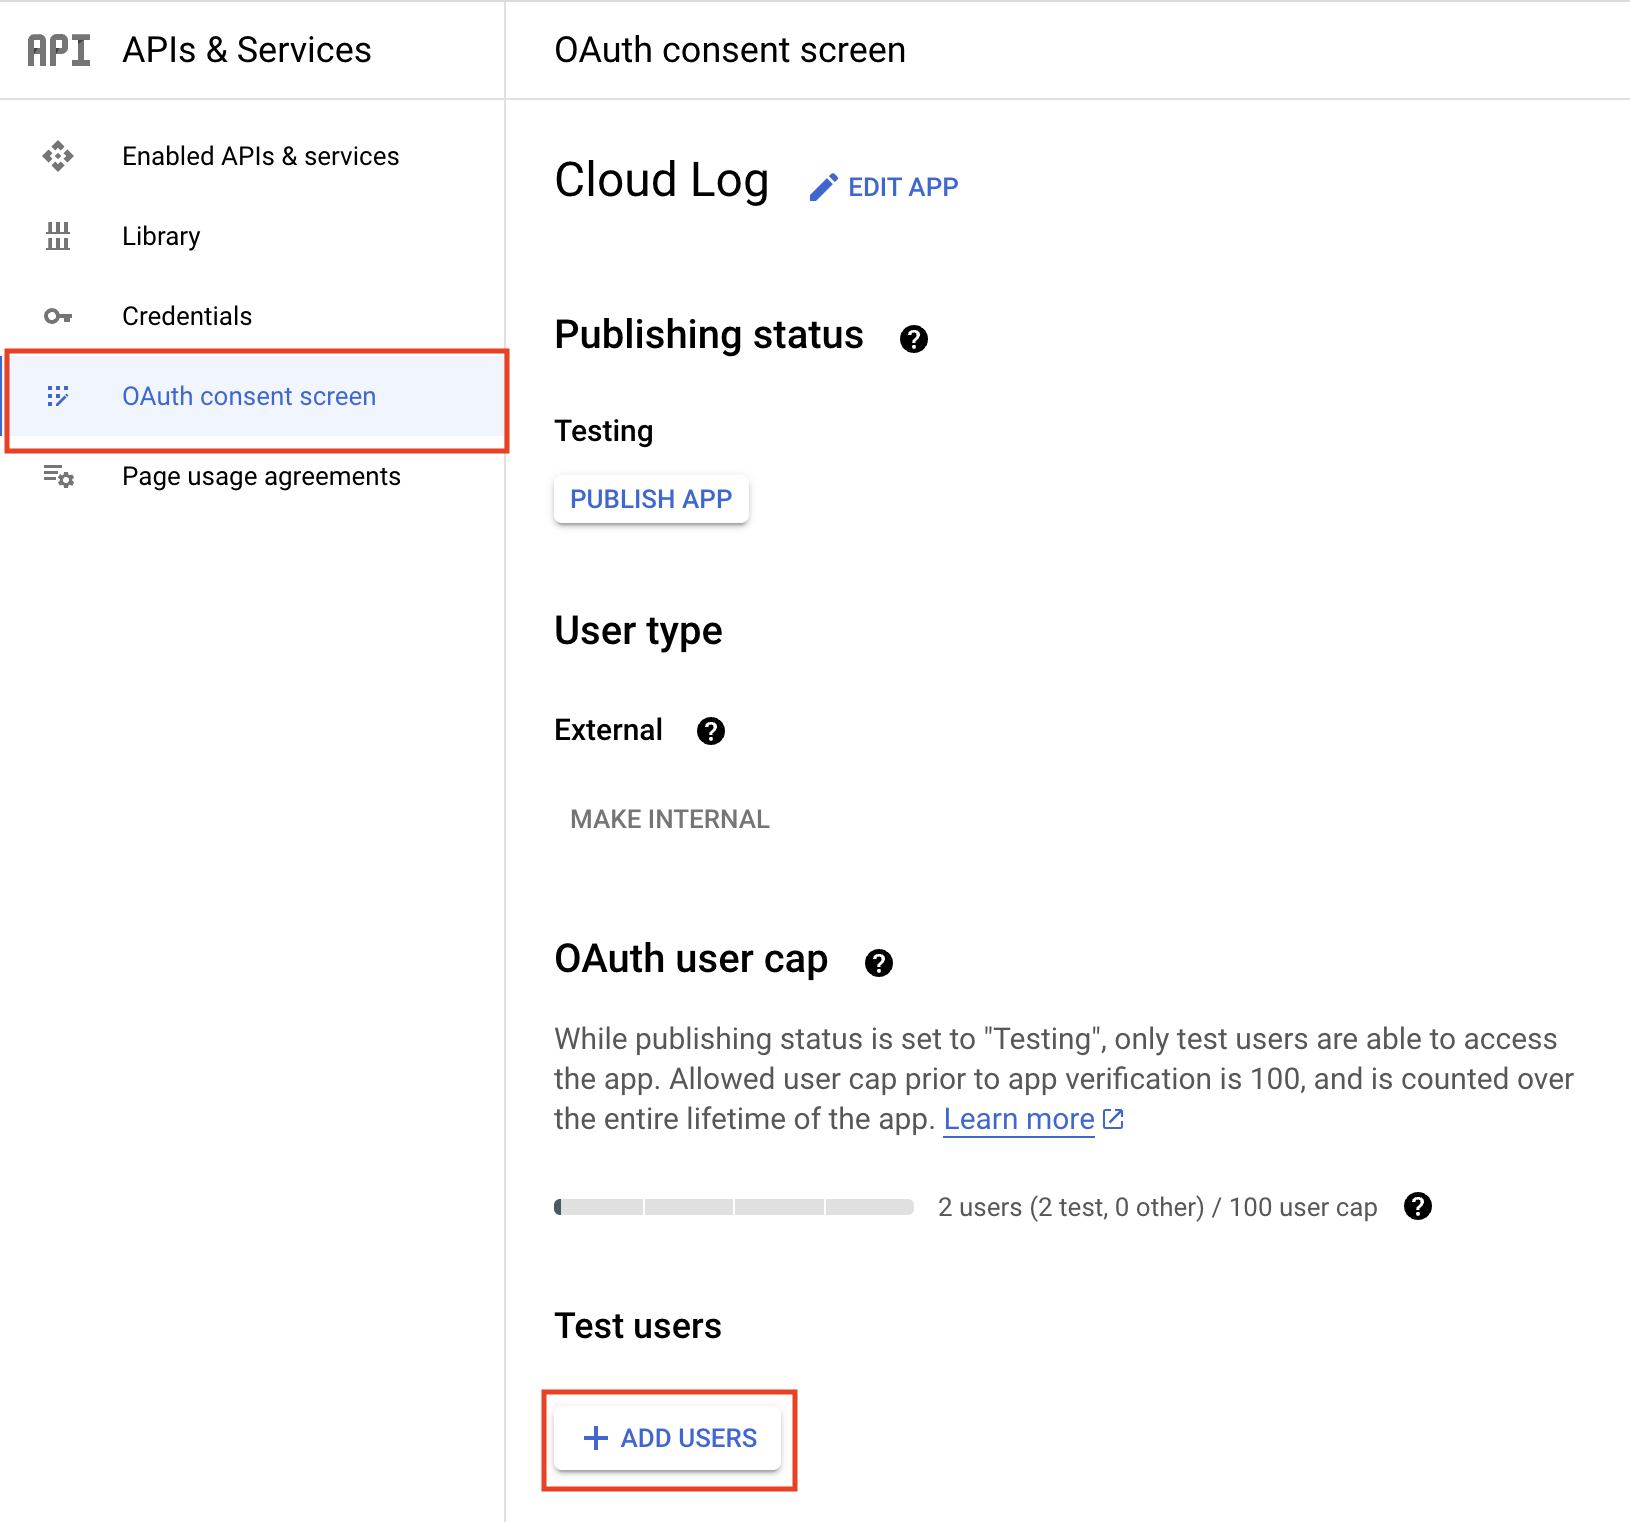
You might have to add yourself as a test user in the “Credentials” section of your project.
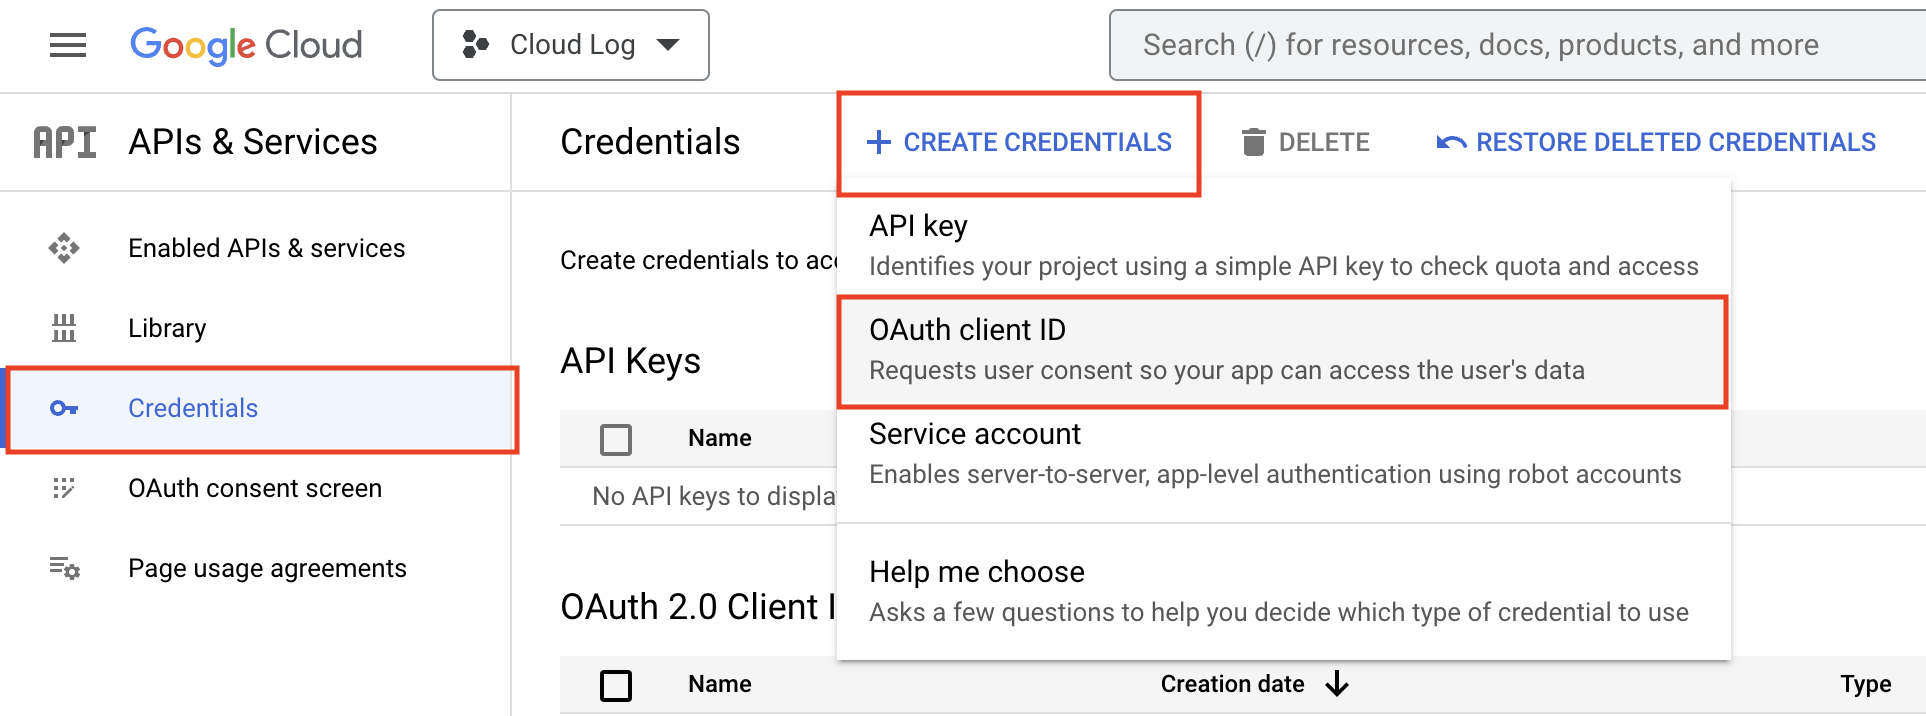
Next, create an OAuth Client by clicking “Credentials” -> “Create Credentials”
Fill out the appropriate fields for the application type and name. In my case, I am using a web application. I am also going to show how to make authenticating requests with PostMan. I am not positive if the other application types work with PostMan as I have not tried it, so just a word of warning!
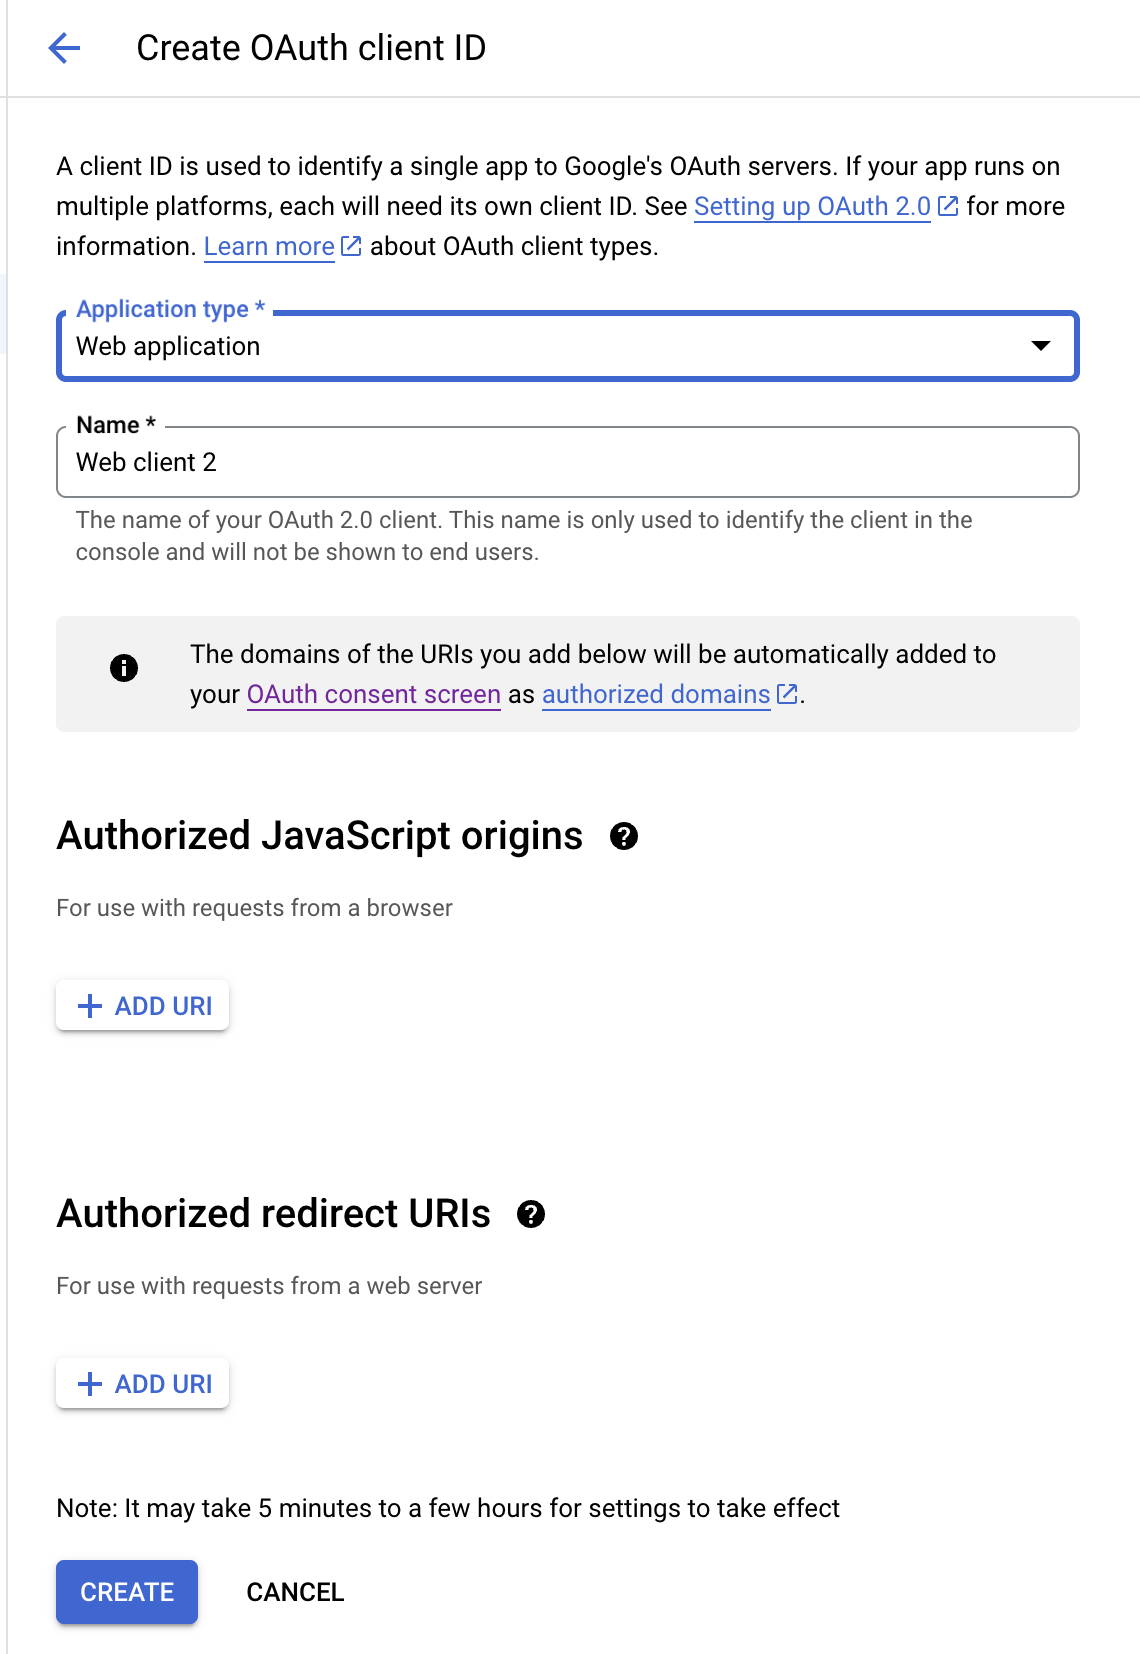
You can ignore the authorized javascript origins for now. However, the redirect URIs for PostMan should contain the following:
- If using web application version of PostMan:
https://oauth.pstmn.io/v1/browser-callback - If using the desktop application version of PostMan:
https://oauth.pstmn.io/v1/callback
For adding the details to the PostMan request, first head to the “Authorization” tab in the folder or request you need to authenticate. The following fields should be filled out:
| Name | Value |
|---|---|
| Type | OAuth 2.0 |
| Callback URL | https://oauth.pstmn.io/v1/callback Make sure “Authorize using browser” is selected. |
| Auth URL | https://accounts.google.com/o/oauth2/v2/auth |
| Access Token URL | https://accounts.google.com/o/oauth2/token |
| Client ID | found on google cloud console |
| Client Secret | found on google cloud console |
| Scope | https://www.googleapis.com/auth/userinfo.email openid |
The scopes are separated by a space. For this example, the scopes say we would like access to the user’s email address and the openid states we want an ID Token. The openid is important!
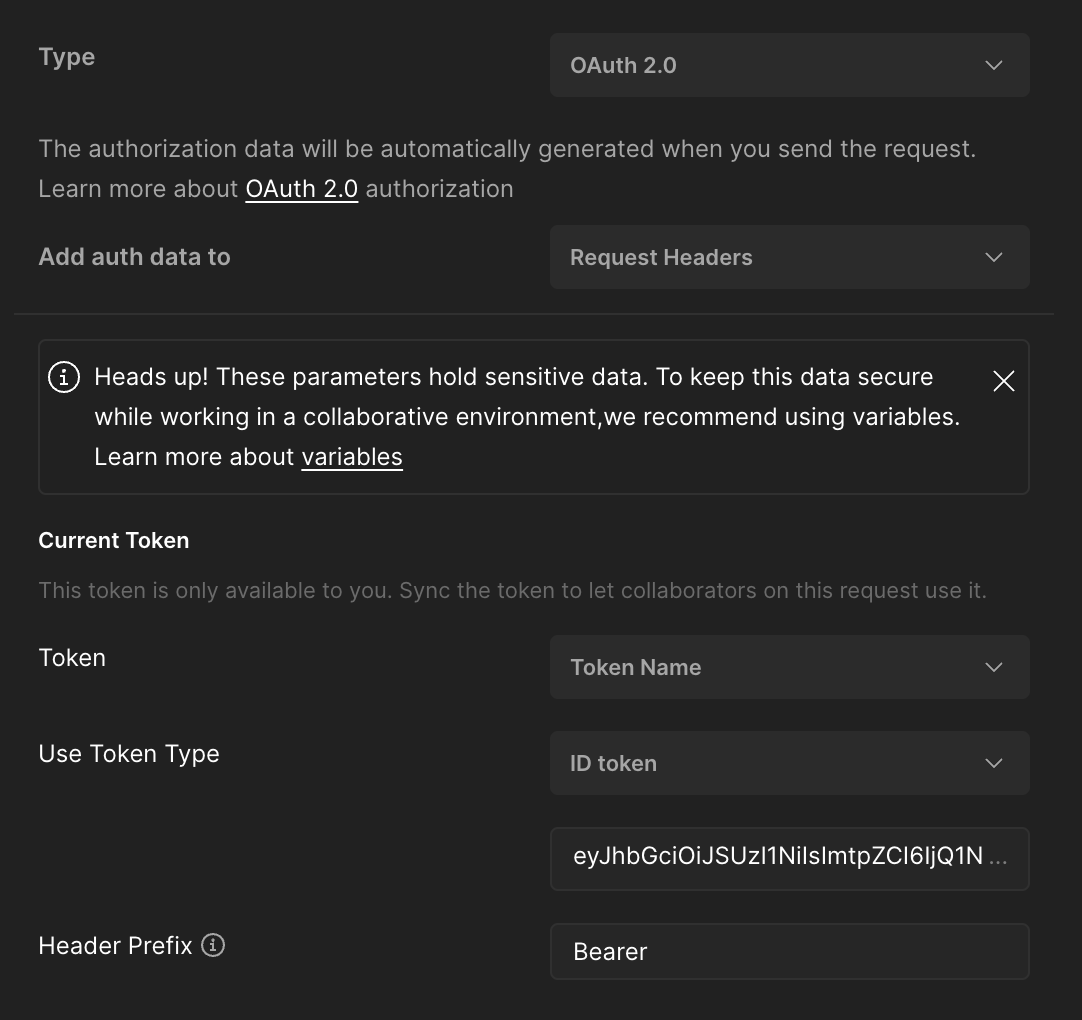
Finally, create the token by selecting Get New Access Token at the bottom. If this works, make sure Use Token Type is set to ID Token and not Access Token.
The basic structure of the Authorization page should look like this:
Adding Authentication to Your WebAPI
The easiest way that I have found is to use a middleware designed by Kristian Hellang. Install can be found here. The additional item to add is very simple. In the Program.cs of you project, or wherever you add services, append this code:
1
2
3
4
services.AddAuthentication(JwtBearerDefaults.AuthenticationScheme)
    .AddJwtBearer(x => x.UseGoogle(
        clientId: "<google-client-id>",
        hostedDomain: "<optional-g-suite-domain>"));
To utilize the authentication on a specific request or controller, simply add [Authorize] to the top of the controller or request method. You should then be able to play around with PostMan and see how it authorizes the requests. Non-authenticated requests should return a 401, whereas authenticated should return whatever status code you specify.